Saturday, December 31, 2011

Visual Basic 2008 Tutorial

Lesson 13: Functions Part II- String Functions 

We have learned about the basic concept of function as well as the MsgBox and InputBox functions in Lesson 12. I. In fact, I have already shown you a few string manipulation functions in Lesson 8, they are the Len function, the Left function and the Right Function. In this lesson, we will learn other string manipulation functions.

13.1 The Mid Function
The Mid function is used to retrieve a part of text form a given phrase. The format of the Mid Function is
     Mid(phrase, position,n)
where
  • phrase is the string from which a part of text is to be retrieved.
  • position is the starting position of the phrase from which the retrieving process begins.
  • n is the number of characters to retrieve.

Example 13.1:
 Private Sub Button1_Click(ByVal sender As System.Object, ByVal e As System.EventArgs) Handles Button1.Click
Dim myPhrase As String
myPhrase = Microsoft.VisualBasic.InputBox("Enter your phrase")
Label1.Text = Mid(myPhrase, 2, 6)
End Sub
* In this example, when the user clicks the command button, an inputbox will pop up asking the user to input a phrase. After a phrase is entered and the OK button is pressed, the label will show the extracted text starting from position 2 of the phrase and the number of characters extracted is 6. The diagrams are shown below:


13.2 The Right Function
The Right function  extracts the right portion of a phrase. The format is
Microsoft.Visualbasic.Right (“Phrase”, n)
Where n is the starting position from the right of the phase where the portion of the phrase is going to be extracted. For example:
 Microsoft.Visualbasic.Right (“Visual Basic”, 4) = asic
 Example 13.2: The following code extracts the right portion any phrase entered by the user.
   Private Sub Button1_Click (ByVal sender As System.Object, ByVal e As System.EventArgs) Handles Button1.Click
        Dim myword As String
        myword = TextBox1.Text
        Label1.Text = Microsoft.VisualBasic.Right (myword, 4)
    End Sub

13.3 The Left Function
The Left function  extracts the left portion of a phrase. The format is
Microsoft.Visualbasic.Right (“Phrase”, n)
Where n is the starting position from the left of the phase where the portion of the phrase is going to be extracted. For example:
 Microsoft.Visualbasic.Left(“Visual Basic”, 4) = asic
 Example 13.3: The following code extracts the left portion any phrase entered by the user.
   Private Sub Button1_Click (ByVal sender As System.Object, ByVal e As System.EventArgs) Handles Button1.Click
        Dim myword As String
        myword = TextBox1.Text
        Label1.Text = Microsoft.VisualBasic.Left (myword, 4)
    End Sub

13.4 The Trim Function
The Trim function trims the empty spaces on both side of the phrase. The format is
Trim(“Phrase”)
.For example,     Trim (“    Visual Basic      ”) = Visual basic
Example 13.4
Private Sub Button1_Click(ByVal sender As System.Object, ByVal e As System.EventArgs) Handles Button1.Click
Dim myPhrase As String
myPhrase = Microsoft.VisualBasic.InputBox("Enter your phrase")
Label1.Text = Trim(myPhrase)
End Sub
13.5 The Ltrim Function
The Ltrim function trims the empty spaces of the left portion of the phrase. The format is
Ltrim(“Phrase”)
.For example,
 Ltrim (“     Visual Basic”)= Visual basic
 
13.6 The Rtrim Function
The Rtrim function trims the empty spaces of the right portion of the phrase. The format is
Rtrim(“Phrase”)
.For example,
Rtrim (“Visual Basic      ”) = Visual Basic

13.7 The InStr function
The InStr function looks for a phrase that is embedded within the original phrase and returns the starting position of the embedded phrase. The format is
Instr (n, original phase, embedded phrase)
Where n is the position where the Instr function will begin to look for the embedded phrase. For example
Instr(1, “Visual Basic”,” Basic”)=8
*The function returns a numeric value.
You can write a program code as shown below:
Private Sub Button1_Click(ByVal sender As System.Object, ByVal e As System.EventArgs) Handles Button1.Click

Label1.Text = InStr(1, "Visual Basic", "Basic")
End Sub
 
13.8 The Ucase and the Lcase Functions
The Ucase function converts all the characters of a string to capital letters. On the other hand, the Lcase function converts all the characters of a string to small letters.
The format is
                    Microsoft.VisualBasic.UCase(Phrase)
                   Microsoft.VisualBasic.LCase(Phrase)
 
For example,
Microsoft.VisualBasic.Ucase(“Visual Basic”) =VISUAL BASIC
Microsoft.VisualBasic.Lcase(“Visual Basic”) =visual basic

13.9 The Chr and the Asc functions

The Chr function returns the string that corresponds to an ASCII code while the Asc function converts an ASCII character or symbol to the corresponding ASCII code. ASCII stands for “American Standard Code for Information Interchange”. Altogether there are 255 ASCII codes and as many ASCII characters. Some of the characters may not be displayed as they may represent some actions such as the pressing of a key or produce a beep sound. The format of the Chr function is
Chr(charcode)
and the format of the Asc function is
Asc(Character)
The following are some examples:
Chr(65)=A, Chr(122)=z, Chr(37)=% ,
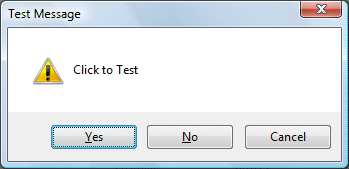
Asc(“B”)=66, Asc(“&”)=38
sage box. The Style Value  will determine what type of command buttons appear on the message box, please refer Table 10.1 for types of command button displayed. The Title argument will display the title of the message board.  

http://www.vbtutor.net/vb2008/vb2008tutor.html 


»»  READMORE...

Tuesday, December 27, 2011

Visual Basic 2008 Tutorial

Lesson 12: Functions-Part I 

A function is similar to a normal procedure but the main purpose of the function is to accept a certain input and return a value which is passed on to the main program to finish the execution. There are two types of functions, the built-in functions (or internal functions) and the functions created by the programmers. 

The general format of a function is
              FunctionName (arguments)
 The arguments are values that are passed on to the function.
In this lesson, we are going to learn two very basic but useful internal functions of Visual basic , i.e.  the MsgBox( ) and InputBox ( ) functions. 

12.1 MsgBox ( ) Function

The objective of MsgBox is to produce a pop-up message box and prompt the user to click on a command button before he /she can continues. This  format is as follows:
          yourMsg=MsgBox(Prompt, Style Value, Title)
The first argument, Prompt, will display the message in the message box. The Style Value  will determine what type of command buttons appear on the message box, please refer ton Table 12.1 for types of command button displayed. The Title argument will display the title of the message board.
Table 12.1: Style Values
Style Value
Named Constant Buttons Displayed
0
vbOkOnly Ok button
1
vbOkCancel Ok and Cancel buttons
2
vbAbortRetryIgnore Abort, Retry and Ignore buttons.
3
vbYesNoCancel Yes, No and Cancel buttons
4
vbYesNo Yes and No buttons
5
vbRetryCancel Retry and Cancel buttons
We can use named constants in place of integers for the second argument to make the programs more readable. In fact, VB6 will automatically shows up a list of named constants  where you can select one of them.
example: yourMsg=MsgBox( "Click OK to Proceed", 1, "Startup Menu")
             and yourMsg=Msg("Click OK to Proceed". vbOkCancel,"Startup Menu")
are the same. 
yourMsg is a variable that holds values that are returned by the MsgBox ( ) function. The values are determined by the type of buttons being clicked by the users. It has to be declared as Integer data type in the procedure or in the general declaration section. Table 12.2 shows the values, the corresponding named constant and buttons.
Table 12.2 : Return Values and Command Buttons
 Value
Named Constant Button Clicked 
1
vbOk Ok button
2
vbCancel Cancel button
3
vbAbort Abort button
4
vbRetry Retry button
5
vbIgnore Ignore button
6
vbYes Yes button
7
vbNo No button

Example 12.1
Private Sub Button1_Click(ByVal sender As System.Object, ByVal e As System.EventArgs) Handles Button1.Click
Dim testmsg As Integer
testmsg = MsgBox("Click to test", 1, "Test message")
If testmsg = 1 Then
MessageBox.Show("You have clicked the OK button")
Else
MessageBox.Show("You have clicked the Cancel button")
End If
End Sub

To make the message box looks more sophisticated, you can add an icon besides the message. There are four types of icons available in VB2008 as shown in  Table 12.3 
 
Value
Named Constant
Icon 
16
vbCritical
32
vbQuestion
48
vbExclamation
64
vbInformation

Example 12.2
Private Sub Button1_Click(ByVal sender As System.Object, ByVal e As System.EventArgs) Handles Button1.Click
Dim testMsg As Integer
testMsg = MsgBox("Click to Test", vbYesNoCancel + vbExclamation, "Test Message")

If testMsg = 6 Then
MessageBox.Show("You have clicked the yes button")
ElseIf testMsg = 7 Then
MessageBox.Show("You have clicked the NO button")
Else
MessageBox.Show("You have clicked the Cancel button")
End If


End Sub The first argument, Prompt, will display the messag
12.2 The InputBox( ) Function
An InputBox( ) function will display a message box where the user can enter a value or a message in the form of text. In VB2005, you can use the following format:
myMessage=InputBox(Prompt, Title, default_text, x-position, y-position)
myMessage is a variant data type but typically it is declared as string, which accept the message input by the users. The arguments are explained as follows:
  • Prompt       - The message displayed normally as a question asked.
  • Title            - The title of the Input Box.
  • default-text  - The default text that appears in the input field where users can use it as his intended input or he may change to the message he wish to enter.
  • x-position and y-position - the position or tthe coordinates of the input box.
However, the format won't work in VB2008 because InputBox is considered a namespace. So, you need to key in the full reference to the Inputbox namespace, which is
Microsoft.VisualBasic.InputBox(Prompt, Title, default_text, x-position, y-position)
The parameters remain the same.
Example 12.3
Private Sub Button1_Click(ByVal sender As System.Object, ByVal e As System.EventArgs) Handles Button1.Click
Dim userMsg As String


userMsg = Microsoft.VisualBasic.InputBox("What is your message?", "Message Entry Form", "Enter your messge here", 500, 700)

If userMsg <> "" Then
MessageBox.Show(userMsg)
Else
MessageBox.Show("No Message")
End If
End Sub

The inputbox will appear as shown in the figure below when you press the command button


sage box. The Style Value  will determine what type of command buttons appear on the message box, please refer Table 10.1 for types of command button displayed. The Title argument will display the title of the message board. 

http://www.vbtutor.net/vb2008/vb2008tutor.html 
 
»»  READMORE...

Friday, December 23, 2011

Visual Basic 2008 Tutorial

Lesson 11: Looping
Visual Basic 2008 allows a procedure to be repeated as many times as long as the processor and memory could support. This is generally called  looping . Looping is required when we need to process something repetitively until a certain condition is met. For example, we can design a  program that adds a series of numbers until the sum exceeds a certain value, or a program that asks the user to enter data repeatedly until he/she keys in the word 'Finish'. In Visual Basic 2008, we have three types of Loops, they are the For.....Next loop, the Do loop. and the While.....End while loop  

11.1  For....Next Loop

The format is:  

For counter=startNumber to endNumber (Step increment)
    One or more VB statements
Next
Sometimes the user might want to get out from the loop before the whole repetitive process is executed, the command to use is Exit For. To exit a For….Next Loop, you can place the Exit For statement within the loop; and it is normally used together with the If…..Then… statement. For its application, you can refer to example 11.1 d.

Example 11.1 a

Dim counter as Integer
For  counter=1 to 10  
ListBox1.Items.Add (counter)
  Next
* The program will enter number 1 to 10 into the list box.
Example 11.1b

Dim counter , sum As Integer
For counter=1  to 100 step 10  
sum+=counter
ListBox1.Items.Add (sum)
 Next

* The program will calculate the sum of  the numbers as follows:
 sum=0+10+20+30+40+.....

Example 11.1c

 Dim counter, sum As Integer
sum = 1000
For counter = 100 To 5 Step -5
sum - = counter
ListBox1.Items.Add(sum)
Next

*Notice that increment can be negative.
The program will compute the subtraction as follow:
1000-100-95-90-.......

Example 11.1d

Dim n as Integer
For n=1 to 10

If n>6 then
Exit For
End If
Else
ListBox1.Items.Add ( n)
 Next

End If

Next
The process will stop when n is greater than 6.

11.2  Do Loop

The formats are

a)   Do While condition
            Block of one or more VB statements
      Loop

b)   Do
            Block of one or more VB statements
      Loop While condition

c)    Do Until condition
              Block of one or more VB statements
       Loop

d)    Do
             Block of one or more VB statements
       Loop Until condition

* Exiting the Loop
Sometime we need exit to exit a loop prematurely because of a certain condition is fulfilled. The syntax to use is known as Exit Do. Lets examine the following example

Example 11.2(a)

       Do while counter <=1000
             TextBox1.Text=counter
             counter +=1
       Loop

* The above example will keep on adding until counter >1000.

The above example can be rewritten as
        Do
               TextBox1.Text=counter

               counter+=1
       Loop until counter>1000

Example 11.2(b)

Private Sub Button1_Click(ByVal sender As System.Object, ByVal e As System.EventArgs) Handles Button1.Click

Dim sum, n As Integer

Do

n += 1

sum += n

ListBox1.Items.Add(n & vbTab & sum)

If n = 100 Then

Exit Do

End If

Loop Sub

In the above  example, we find the summation of 1+2+3+4+……+100.  In the design stage, you need to insert a ListBox into the form for displaying the output, named List1. The program uses the Add method to populate the ListBox. The statement ListBox1.Items.Add(n & vbTab & sum) will display the values of n  and sum and  uses the vbTab function to create a space between the headings n and sum.  

11.3  While ...End While Loop

The structure of a While….End While is very similar to the Do Loop. it takes the following format:
 While condition
        Statements
End While
The above loop means that while the condition is not met, the loop will go on. The loop will end when the condition is met. 

Example 11.3

Dim sum, n  As Integer
Private Sub Button1_Click(ByVal sender As System.Object, ByVal e As System.EventArgs) Handles Button1.Click
Dim sum, n As Integer
While n <> 100
n += 1
sum = sum + n
ListBox1.Items.Add(n & vbTab & sum)
End While

End Sub

http://www.vbtutor.net/vb2008/vb2008tutor.html


»»  READMORE...

Wednesday, December 21, 2011

Visual Basic 2008 Tutorial

Lesson 10: Select Case Control Structure
 In the previous lesson, we have learned how to control the program flow using the If...ElseIf control structure. In this chapter, you will learn  another way to control the program flow, that is, the Select Case control structure. However, the Select Case control structure is slightly different from the If....ElseIf control structure . The difference is that the Select Case control structure basically only make decision on one expression or dimension (for example the examination grade) while the If ...ElseIf statement control structure may evaluate only one expression, each If....ElseIf statement may also compute entirely different dimensions. Select Case is preferred when there exist many different conditions because using If...Then..ElseIf statements might become too messy.

10.1 The Select Case...End Select Structure
The format of the Select Case control structure is show below:
Select Case test expression
   Case expression list 1
        Block of one or more VB statements
   Case expression list 2
        Block of one or more VB Statements
   Case expression list 3
        Block of one or more VB statements
   Case expression list 4
        .
        .
        .
   Case Else
        Block of one or more VB Statements
End Select

Example 10.1
' Examination Grades
Dim grade As String
Private Sub Compute_Click( )
grade=txtgrade.Text
Select Case grade
  Case  "A"
       Label1.Text="High Distinction"
  Case "A-"
      Label2.Text="Distinction"
  Case "B"
        Label3.Text="Credit"
  Case "C"
        Label4.Text="Pass"
  Case Else
        Label5.Text="Fail"
  End Select
Example 10.2

In this example, you can use the keyword Is together with the comparison operators.

Private Sub Button1_Click(ByVal sender As System.Object, ByVal e As System.EventArgs) Handles Button1.Click

'Examination Marks

Dim mark As Single
 mark = mrk.Text
 
Select Case mark
 Case Is >= 85
 
     Label1.Text= "Excellence"
Case Is >= 70
 
    Label2.Text= "Good"

Case Is >= 60
   Label3.Text = "Above Average"

Case Is >= 50
Label4.Text= "Average"

Case Else
Label5.Text = "Need to work harder"
End Select

End Sub


Example 10.3

Example 10.2 could be rewritten  as follows:
 

Private Sub Button1_Click(ByVal sender As System.Object, ByVal e As System.EventArgs) Handles Button1.Click

'Examination Marks
Dim mark As Single

 mark = mrk.Text
 
Select Case mark
 Case 0 to 49
 
     Label1.Text = "Need to work harder"
 
Case 50 to 59
 
    Label2.Text = "Average"
 
Case 60 to 69
   Label3.Text= "Above Average"

Case 70 to 84
Label4.Text = "Good"

Case Else
Label5.Text= "Excellence"
End Select

End Sub

 
http://www.vbtutor.net/vb2008/vb2008tutor.html
»»  READMORE...

Sunday, December 18, 2011

Visual Basic 2008 Tutorial

Lesson 9: Controlling Program Flow 
 
In the previous lessons, we have learned how to program code that accept input from the users and display the output without controlling the program flow. In this chapter, you will learn how to write VB2008 code that can make decision when it process input from the users, and control the program flow in the process. Decision making process is an important part of programming because it will help solve practical problems intelligently so that it can provide useful output or feedback to the user. For example, we can write a VB2008 program that can ask the computer to perform certain task until a certain condition is met, or a program that will reject non-numeric data. In order to control the program flow and to make decisions, we need to use the conditional operators and the logical operators together with the If control structure.

9.1  Conditional Operators
 The conditional operators are powerful tools that resemble mathematical  operators . These operators allow a VB2008 program to compare data values and then decide what actions to take, whether to execute a program or terminate the program and more. They are also known as numerical comparison operators. Normally they are used to compare two values to see whether they are equal or one value is  greater or less than the other value. The comparison will return a true or false result. These operators are shown in Table 9.1. 
able 9.1: Conditional Operators


Operator
Meaning

=
Equal to

>
More than

<
Less Than

>=
More than and equal

<=
Less than and equal

<>
Not Equal to


9.2  Logical Operators

 Sometimes we might need to make more than one comparisons before a decision can be made and an action taken. In this case, using numerical comparison operators alone is not sufficient, we need to use additional operators, and they are the logical operators. These logical operators  are shown in Table 9.2. 
Table 9.2
Operator
Meaning
And
Both sides must be true
or
One side or other must be true
Xor
One side or other must be true but not both
Not
Negates truth
* Normally the above operators are use to compare numerical data. However, you can also compare strings with the above operators. In making strings comparison,  there are certain rules to follows: Upper case letters are less than lowercase letters, "A"<"B"<"C"<"D".......<"Z" and number are less than letters.

9.3  Using  the If control structure  with the Comparison Operators

To effectively control the VB2008 program flow, we shall use the If control structure together with the conditional operators and logical operators. There are basically three types of If control structures, namely If....Then statement, If....Then... Else statement and If....Then....ElseIf statement.
9.3(a) If....Then Statement
This is the simplest control structure which  ask the computer to perform a certain action specified by the VB expression if the condition is true. However, when the condition is false, no action will be performed. The general format for the if...then.. statement is


If  condition Then

VB expression

End If
 
Example 9.1
Private Sub Button1_Click(ByVal sender As System.Object, ByVal e As System.EventArgs) Handles Button1.Click
Dim myNumber As Integer
myNumber = TextBox1.Text
If myNumber > 100 Then
Label2.Text = " You win a lucky prize"
End If
End Sub

* When you run the program and enter a number that is greater than 100, you will see the "You win a lucky prize" statement. On the other hand, if the number entered is less than or equal to 100, you don't see any display.

http://www.vbtutor.net/vb2008/vb2008tutor.html
»»  READMORE...